Metahumans in Colony Break
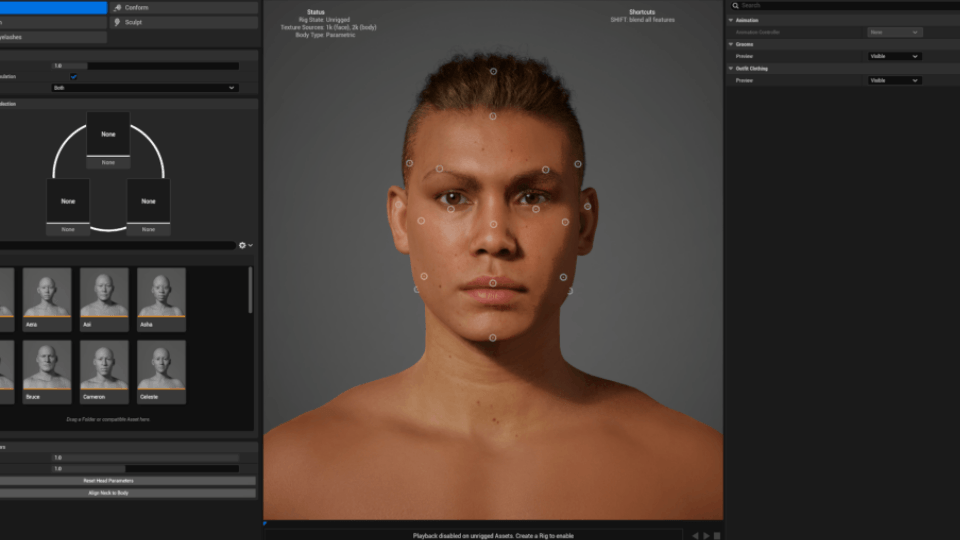
The Metahuman plugin is definitely one of the greatest tools Unreal Engine has released in recent years. It is well known for its ease of use within the editor: you simply create a custom character, choose a body type, edit the face, hair, and many other options, then click export—and you’re done.
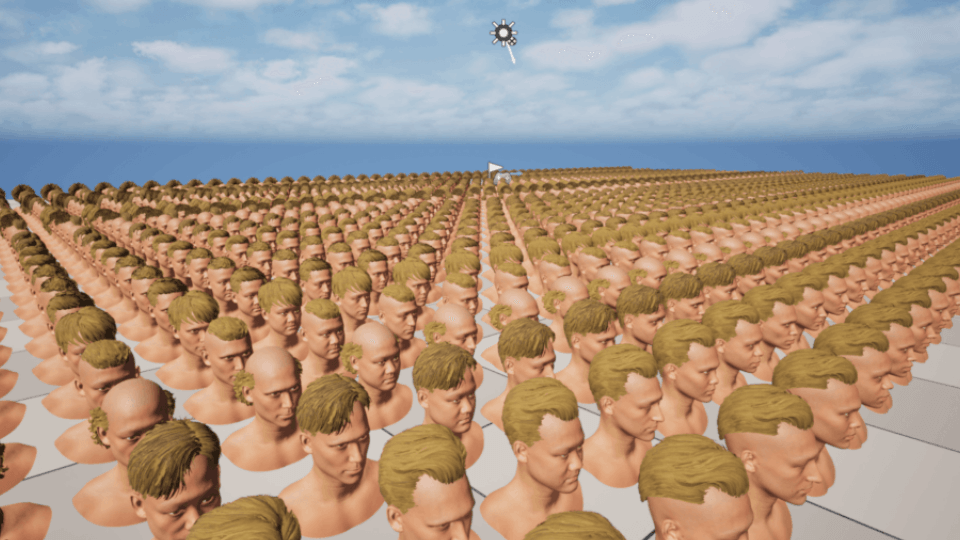
Metahumans are most commonly used in the cinematic field (we used it also for our Cinematic Trailer), as they come with a high performance cost due to their visual quality, or in third-person and first-person games where only a limited number of characters are on screen. But what about using it in a colony sim? What if you need a large number of characters moving around the scene at a low performance cost? That’s exactly what we achieved in Colony Break, and it works like a charm.
We created our characters one by one, carefully editing and sculpting their faces. We ended up with a large number of them. The question then became: how do we optimize them?
Two materials
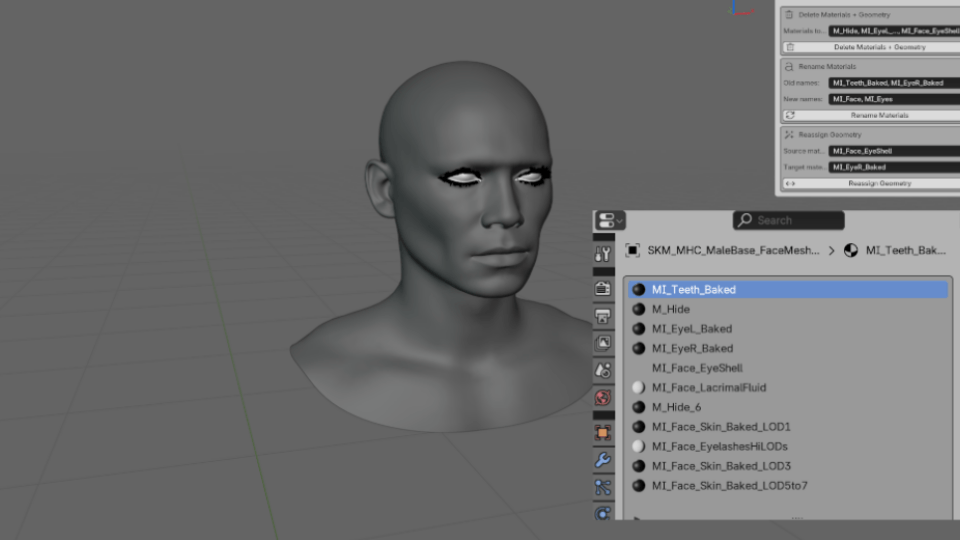
To reduce draw calls and avoid having too many materials, we modified the Metahuman faces to use only two materials. Of course, there is a trade-off. Since we don’t require close-up camera shots or facial animations, we don’t need all the eyes and mouth materials, so we can simply remove them.
We imported the characters into Blender and deleted all materials except one for the face and one for the eyes. At first, this process was tedious, as deleting and reassigning materials manually took a lot of time. To solve this, we created a custom Blender add-on that allows us to complete the process in literally a few seconds.
Here’s how it works: once the face FBX skeleton is exported from Unreal Engine, we import it into Blender. Then we open the add-on and fill in the required inputs. The first input specifies all the eye materials we want to delete; the add-on removes them along with their assigned geometry. The second input renames materials that do not have correct default names. The final input assigns the geometry of one eye to the other, since they are separated by default. Once this setup is done, it only takes three clicks to process a face.
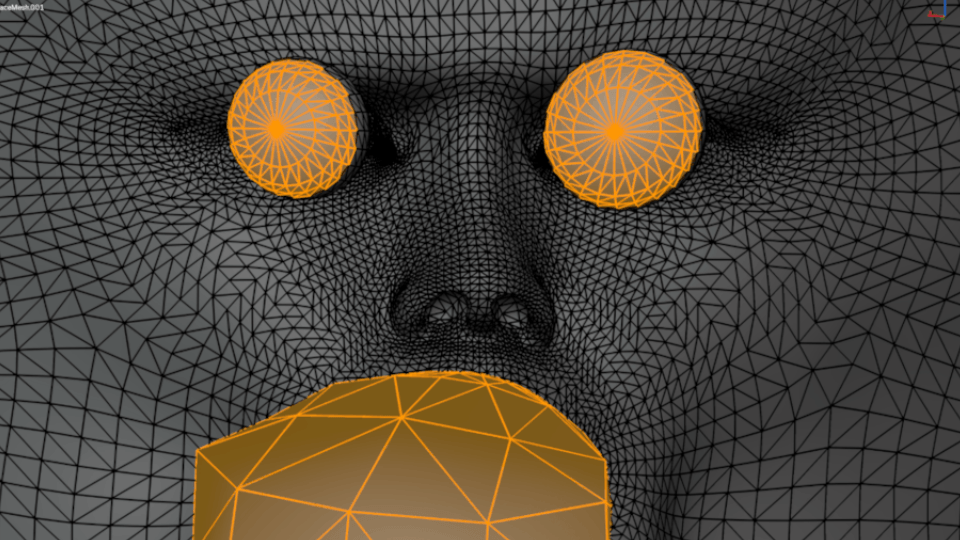
Finally, we removed unnecessary internal geometry inside the head, such as the mouth and parts of the eyes.
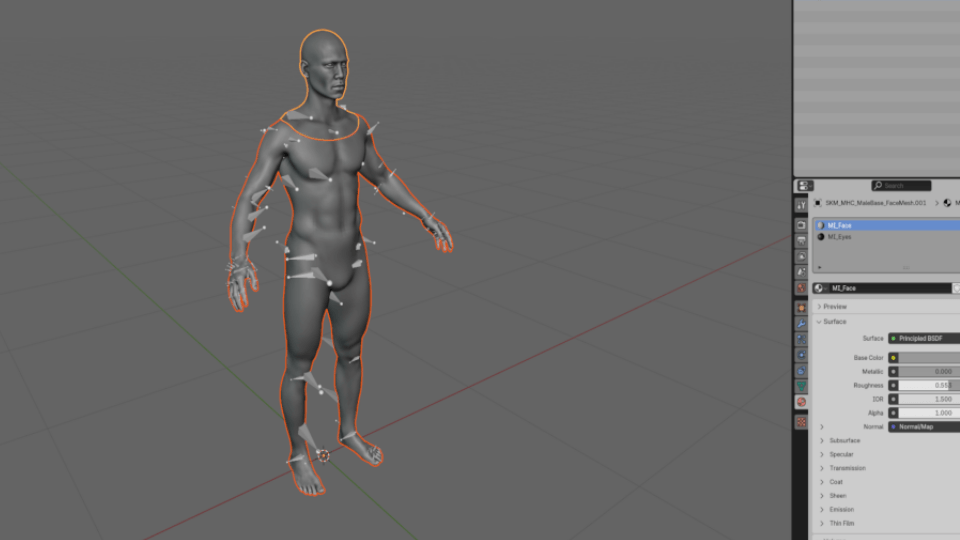
One skeleton
This step is not applied to main characters, as they need to remain modular, but it works perfectly for Colony Break enemies, which are not modular and there are a lot of them.
We then imported the body and face, joined them, and applied the two-material setup discussed earlier. After that, we assigned the face material to the body, resulting in one material for the entire body (including the face) and one material for the eyes. We selected the face skeleton, unparented it, and deleted it.
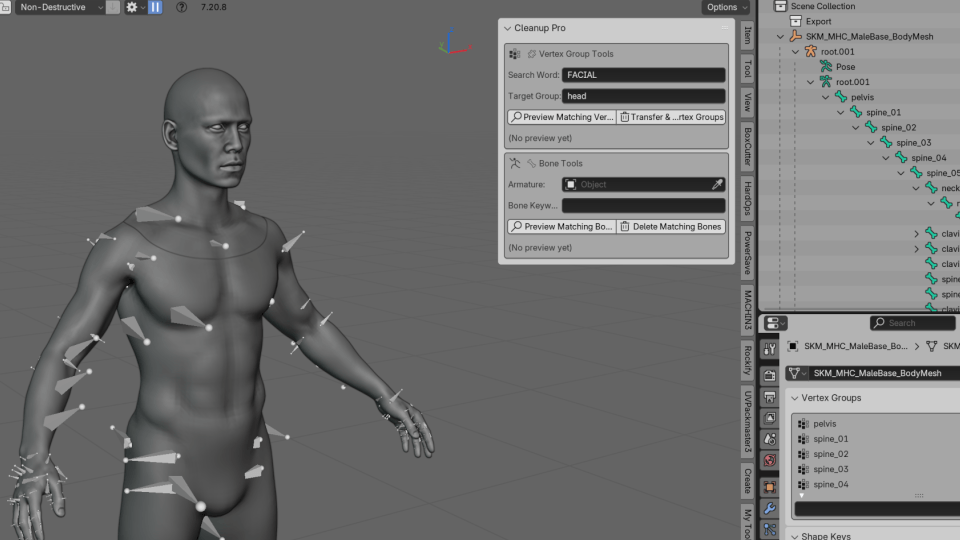
Joining the body and skeleton can be tricky, so we created another add-on to simplify the process. We needed to transfer the FACIAL vertex weights to the head, so in the first input we specify “FACIAL” and in the second “HEAD.” In just a moment, all facial vertex data is transferred. Then we simply join the body and mesh, making sure to merge non-manifold vertices.
This workflow may sound tricky, but with the help of these two custom add-ons, it becomes very straightforward. Once the pipeline is set up, it’s easy to iterate and go back and forth.
In our honest opinion, development would have been much harder without Metahumans. As being two solo devs it saved us a tremendous amount of time, and being a free tool makes it even more valuable.